
Updating the software on a sensor node
Sensor nodes get new software the same way you would copy a file onto a USB stick. You need a computer, a micro USB cable and a Phillips screwdriver, and about five minutes a node. Nothing about the node changes except the program: its serial number, its sensors and its place in your account all stay put.
Who needs this:
- Anyone adding a gateway. Nodes that shipped before October 2025 only know how to talk to a Sensor Hub. This update teaches them to talk to a gateway too, and a switch inside picks which one.
New nodes ship with the current software. If your node arrived in 2026 and already talks to your gateway, there is nothing to do.
Download the file#
Download SapSpy node software V15 (SapSpyNode_Firmware_V15.uf2, about 250 KB)
Save it somewhere you can find it, such as the Desktop. The same file works for every Sap Spy sensor node, one port or four, and it is safe to load more than once.
What you need#
- A Windows PC, Mac or Chromebook.
- A micro USB cable that carries data. Most phone charging cables from the last ten years do; a very cheap charge-only cable will power the node but no drive will appear.
- A Phillips screwdriver for the four cover screws.
- The node. It can be done in the sugarhouse or at the kitchen table, one node at a time, and the node can stay claimed to your hub while you do it.
Step by step#
- Take the cover off. Four Phillips screws at the corners.
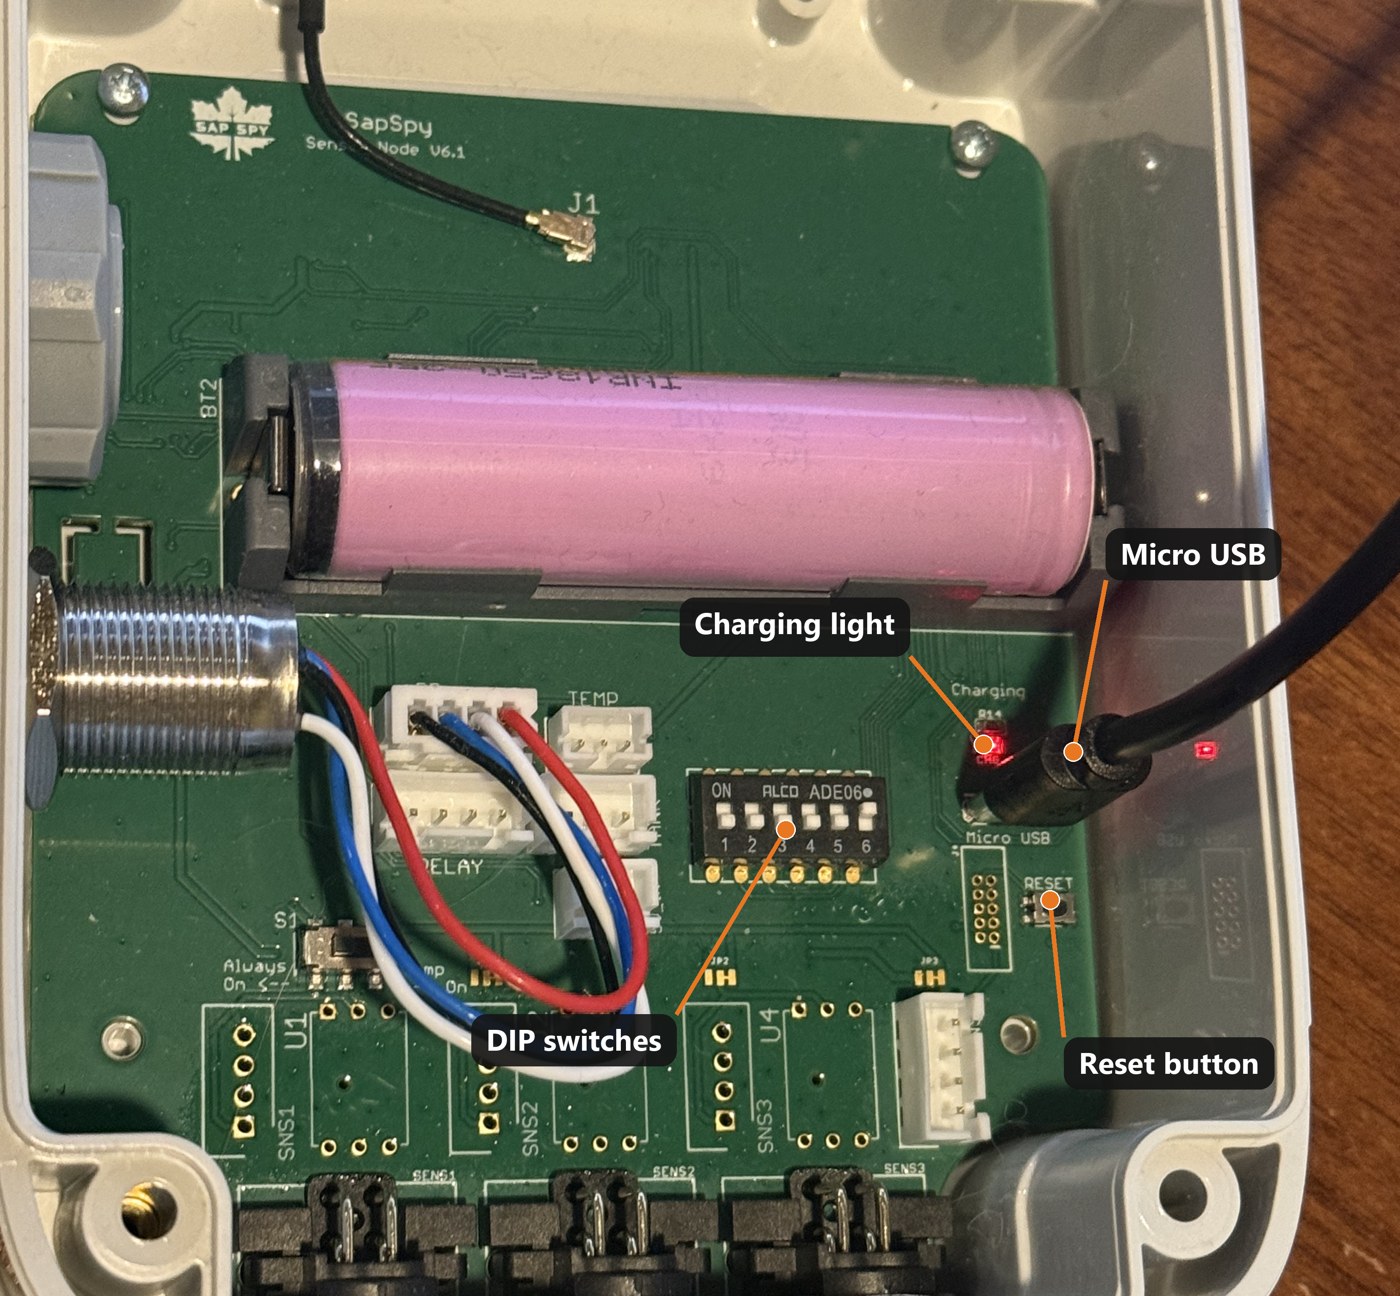
- Plug the micro USB cable into the node, then into the computer. The red charging light next to the connector comes on.
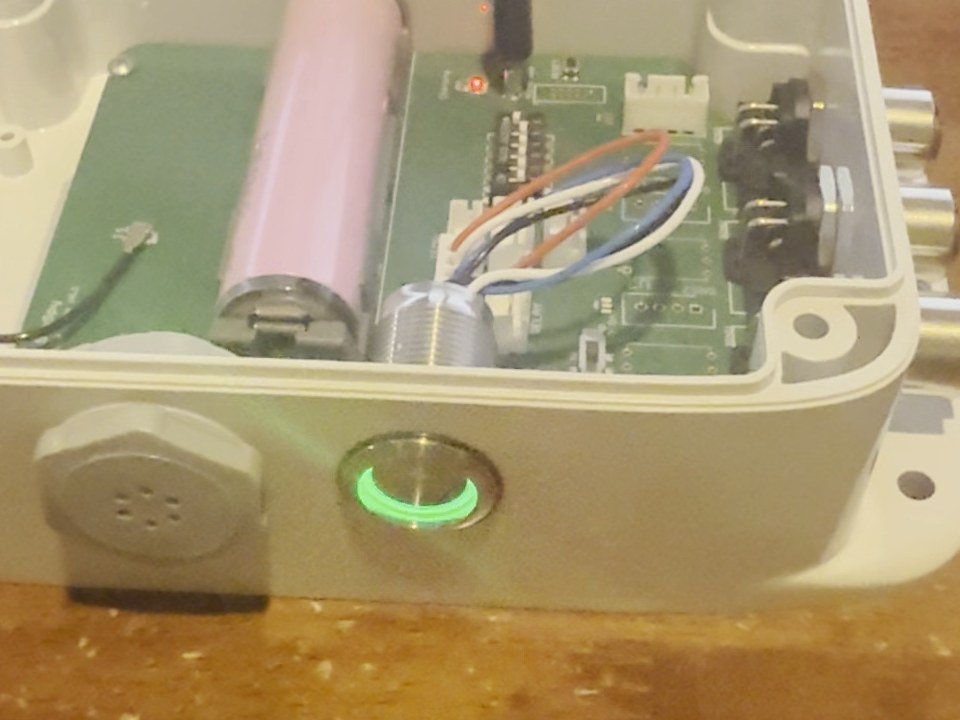
- Turn the node on with the push button on the outside of the case, if it is not on already. The ring around the button lights up.
- Press the small reset button twice, quickly, like a double click. It is the tiny black button just below the USB connector. A fingernail or the tip of a pen works. The ring around the on/off button starts to breathe, slowly brightening and dimming. That means the node is ready to take a file.
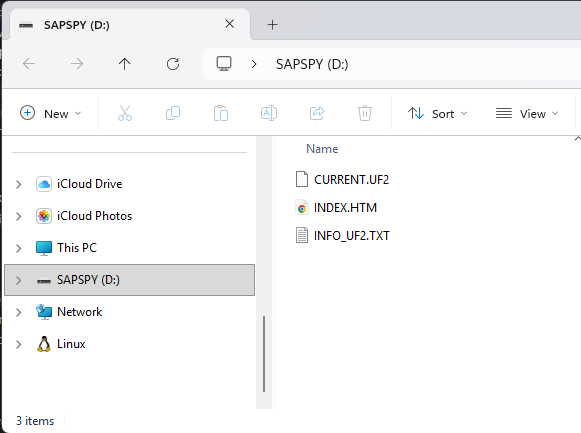
- Look for a new drive on the computer called SAPSPY. On Windows it opens in File Explorer like a USB stick; on a Mac it appears on the Desktop; on a Chromebook it is in the Files app. It holds three small files, which you can ignore.
- Copy the file you downloaded onto the SAPSPY drive. Drag and drop, or copy and paste. The copy takes a few seconds, then the drive disappears on its own and the node restarts with the new software. That disappearing is normal; it is how you know it worked. If the computer complains that the drive was removed without ejecting, ignore it.
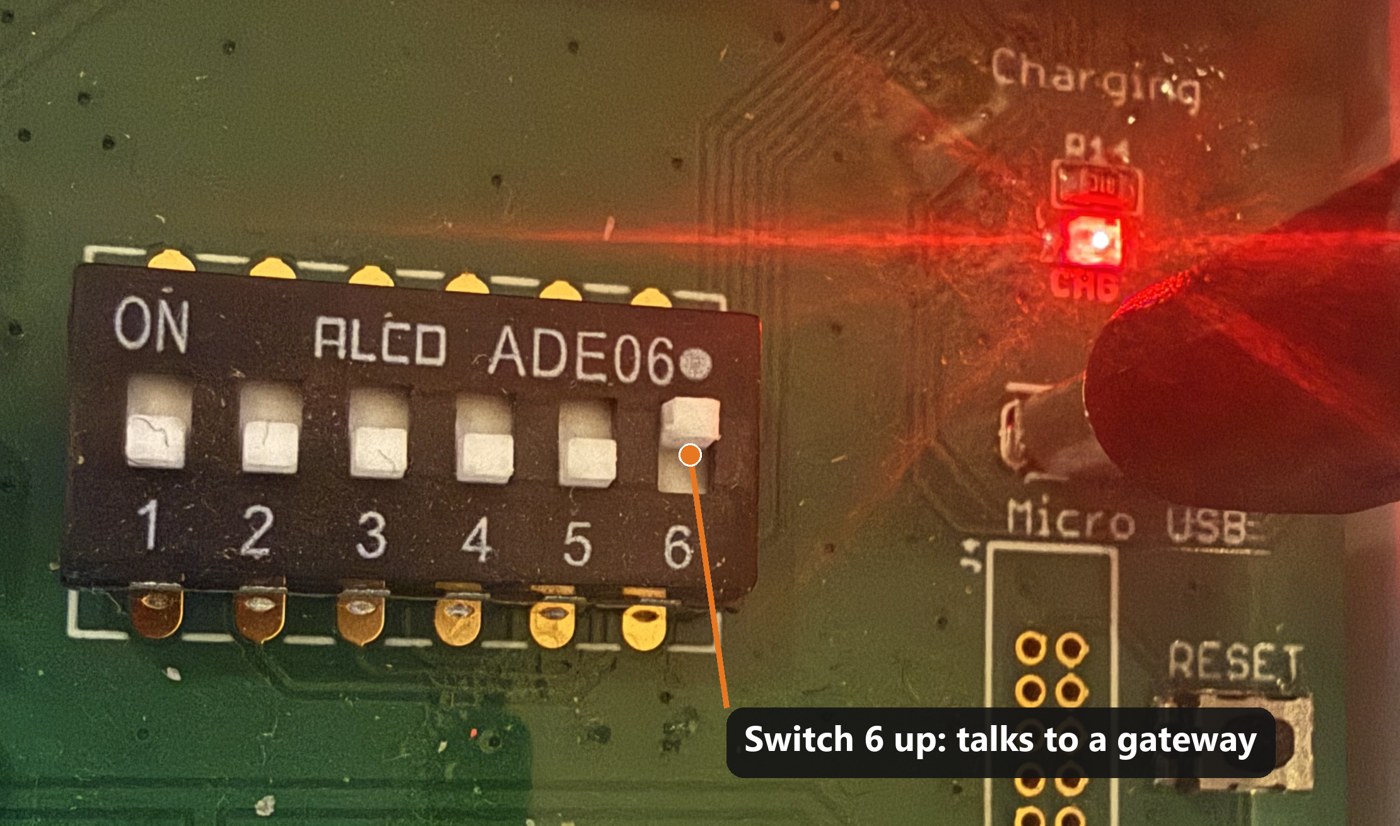
- Set the switch for your system. Inside the node is a block of six tiny DIP switches. Switch 6 up (ON) means the node talks to a gateway. Switch 6 down means it talks to a Sensor Hub. Switches 1 to 5 stay where they are.
- Turn the node off and on with the push button. The ring lights solid, then blinks as it finds the gateway or hub. Within a few minutes the node reports in the Sap Spy app as usual.
- Put the cover back on, and on to the next node.
Going from a hub to a gateway#
Do the update on every node, then flip switch 6 up on each as you go. A node with switch 6 up only listens for a gateway, so leave the gateway powered on while you work. Nothing needs to change in the app: the node keeps its name and its history, and the next reading simply arrives through the gateway. If you ever want a node back on a hub, flip switch 6 down and power cycle it.
Where the gateway should go, and how to mount it: Installing your gateway.
No computer handy?#
We can lend you a pocket flasher, a small battery-powered box that does the file copy for you: plug the node in, double press reset, wait for the light. Email info@sapspy.com. Here is what it looks like in use:
FAQs
No. The node's serial number, sensor setup and identity live in a separate memory chip that the update does not touch. Your readings live on our servers. The node comes back as the same node in the app.
Press the reset button a little faster, two presses within about half a second. Make sure you are pressing the small black reset button on the board, not the on/off button on the case. The node should be powered on and plugged into the computer first.
Nine times out of ten it is the cable: try a different micro USB cable, one you know carries data to a phone. Then try another USB port on the computer. If the breathing light is going, the node is ready and the problem is between it and the computer.
Give it ten seconds. If it is still there, check the file you copied is the .uf2 you downloaded from this page and not a shortcut to it, and copy it again. If the copy fails with an error, download the file again; a half-downloaded file will not load.
Not reliably. Use a PC, Mac or Chromebook, or ask us for a pocket flasher.
If the node talks to a gateway at all, it has V12 or later. Loading the current file is safe at any version, so if in doubt, load it.
Check switch 6 is up and the node was power cycled afterward. Check the gateway has lights on the bottom and shows online in the app. Then bring the node within sight of the gateway and power cycle it once more; if it connects there, the problem is range, see Planning gateway coverage. If it still will not connect, email info@sapspy.com with the node's serial number and we will look at it from our side.
Have a question this doesn't answer? Email info@sapspy.com or call 920-809-4811. We're producers too.